


Knowing how to install fiber cement siding is one thing; doing it the way a professional crew does is another. It's the difference between a job that hits schedule and passes inspection the first time, and one that racks up callbacks, rework and warranty headaches down the line.
For a crew, installation isn't just about technique. It means managing workflow efficiently, staying compliant with OSHA silica dust regulations, handling materials safely, keeping fastening consistent across every course and troubleshooting issues in the field before they become bigger problems.
From crew workflow and job site safety to material handling, fastening standards and common field fixes, the details below reflect how experienced contractors actually get it done.
Remember: Installation specifications vary by manufacturer. Always confirm exact clearances, overlap and fastener details against the official guide for the specific siding product you are installing.
Setting Up a Staging and Cutting Station
An efficient installation starts well before the first plank is fastened. Organizing the job site reduces wasted movement, minimizes material damage and lets crew members focus on a defined task.
Designate separate areas on-site for material storage, cutting, waste collection and finished product staging. Siding products must be covered and stored off the ground, on a clean, flat and level surface. The product should be stored in its original packaging and in a covered area such as a garage to protect the product from the weather.
To maximize speed and accuracy on-site, a standard crew divides the installation process across distinct roles:
Material Handler: Receives, organizes and stages all siding materials near the work area for seamless flow.
Cut Station Specialist: Measures, cuts and labels boards so pieces are immediately ready for installation.
Lead Installer: Fastens siding boards into place while actively monitoring layout alignment and reveals.
Secondary Installer (Optional): Joins the lead installer on the wall to hold long boards and speed up installation.
Quality Control Lead: Inspects completed sections to verify accurate reveals, proper layout tolerances and overall installation quality.
This assembly-line approach keeps installers working continuously instead of stopping to measure or retrieve materials, keeping output consistent across the day.
Controlling Silica Dust
Cutting fiber cement siding generates respirable crystalline silica (RCS), which can pose serious health risks if proper protocols aren’t taken.
OSHA's Respirable Crystalline Silica Standard requires employers to limit worker exposure through engineering controls, appropriate tools and respiratory protection when necessary.
To keep crews safe, be sure to:
Use fiber cement shears that produce minimal dust
Select blades designed specifically for fiber cement (if using a circular saw)
Follow manufacturer recommendations for PPE, including eye and respiratory protection
Have cutting stations outdoors and position them downwind from occupied areas
Equip saws with integrated dust collection systems connected to HEPA-filter vacuums
Handling and Transporting Boards
Fiber cement is strong and resilient after installation, but individual boards can be damaged during transport if they’re handled improperly. Carry long planks on edge rather than flat to reduce flexing, and always rely on two installers when moving larger panels. Don't drag boards across one another, as doing so can damage finishes or chip edges.
Before installation, inspect every board for shipping damage, moisture exposure or edge defects. Installing damaged material increases the risk of visible imperfections and unnecessary warranty claims.
Wall Preparation and Substrate Requirements
High-quality installations start with a properly prepared wall system. Verify that framing is straight, sheathing is securely fastened and wall surfaces are free of significant irregularities. Even minor framing inconsistencies can create visual waves across finished siding.
Install a code-compliant, water-resistive barrier and integrate flashing around windows, doors, roof intersections and penetrations, following local building codes and manufacturer instructions.
Check that fastener spacing aligns with framing members throughout the wall. Separately, confirm that the siding maintains proper clearance above roofing, decks, concrete and finished grade. Inadequate clearance is one of the most common causes of moisture intrusion and premature siding failure.
Before starting installation, review the manufacturer's fastening schedules, joint treatments and expansion requirements. This keeps every installer on the crew working to the same standard.
Step-by-Step Installation Protocols for Speed and Quality
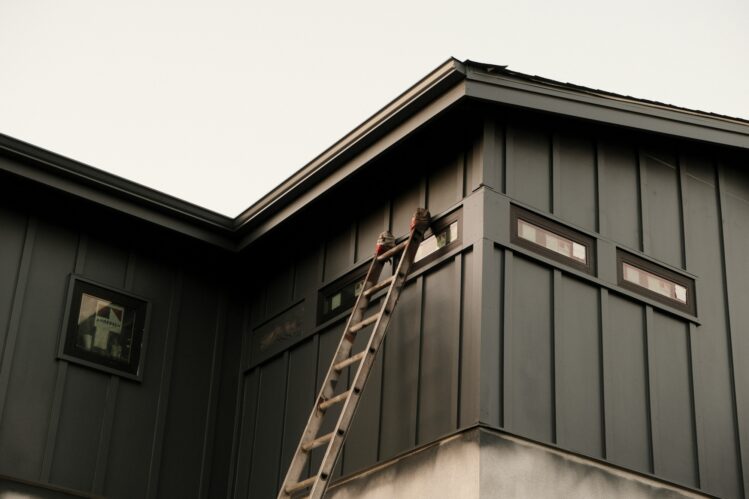
Standardizing installation procedures helps every crew member work at the same pace while maintaining consistent quality across the project.
Starter Strip and Nailing Lines
Accuracy starts with the first course, so working carefully is essential.
Start with a level starter strip. It will set the angle for the first row so that everything above it follows. Laser levels or chalk lines will help keep reveals consistent as you move across the elevation. For nail placement and edge clearances, stick to the manufacturer's spec for blind or face nailing.
Done right, blind nailing hides the fasteners and holds the board securely; that's what gives the wall its clean look once it's finished. Face nailing gives even more holding power, as the nails are going through two courses of lap siding. Check your work closely on those first few courses. A small error quickly multiplies as you move up the wall.
Compressor Pressure and Fastening Cycles
Nail depth makes or breaks the job. Drive fasteners too deep, and you weaken the board's holding strength or damage the surface outright. If you don’t drive deep enough, the nails will get in the way when the next course overlaps.
Before production starts each day, test compressor pressure on scrap material first, then check that nails are seating flush without recessing into the board. If the temperature swings or someone adjusts the compressor mid-shift, recheck the pressure before continuing. In-line regulators at the gun allow for more nuanced control and help smooth pressure fluctuations, especially if more than one gun is attached to the compressor.
Fasteners should be corrosion-resistant and manufacturer-approved, with length matched to the listed assemblies in the relevant code evaluation report. This daily check only takes a few minutes, but skipping it is how crews end up with inconsistent fastening across an elevation.
Corner Post Treatments
Corners take planning. Get them wrong, and it shows in both how the wall holds up over time and in how it looks.
Most outside corners use prefinished or field-painted trim boards, which give you a clean reference line for the rest of the elevation. Behind the trim, keep clearances and flashing details in line with spec.
Inside corners are more of a judgment call: trim boards work, but so do approved corner accessories, depending on what the project calls for. Whichever profile you use, keep expansion gaps consistent and only seal joints where the manufacturer says to.
Common Field Adjustments and On-Site Troubleshooting
No installation goes perfectly to plan, and field adjustments are part of the job.
Framing isn't always dead straight, but a little shimming here and there keeps the courses looking level even when the studs aren't cooperating.
If you notice exposures starting to drift, stop. Go back and check the layout instead of trying to fix it by eye as you climb the wall. That's how small errors turn into a visible slope by the time you reach the top.
Common issues to prepare for include:
Uneven reveals caused by an out-of-level starter strip
Fasteners driven too deep from excessive compressor pressure
Chipped edges from improper handling or the wrong tools
Loose siding caused by over-driven fasteners or high-nailing
Conduct quality-control inspections throughout the installation, not just at the end of the project. Catching problems early reduces rework and helps keep the job on schedule.
Maintain detailed punch lists for each elevation. This improves installer-supervisor communication and prevents costly post-project callbacks.
Build Efficiency With Allura Solutions

Knowing how to install fiber cement siding efficiently means combining skilled craftsmanship with organized workflows, standardized installation practices and strict safety procedures. From staging materials and controlling silica dust to maintaining consistent fastening and accurate layout, every detail matters.
For professional crews, executing these practices smoothly depends on working with materials engineered for reliability. That is where Allura’s fiber cement comes in. Designed for ease of handling and consistent dimensions, Allura’s product line allows teams to apply these standardized workflows without fighting inconsistent boards on site.
Backed by more than 75 years of manufacturing experience and a 30-year transferable limited warranty, Allura provides fiber cement solutions built to help contractors work faster and deliver lasting results.
Ready to put these practices to work on your next job? Explore Allura's fiber cement product lineup or contact the Allura team for technical support and detailed product specifications.